


Introduction:
In the realm of digital photography, the iPhone has emerged as a powerhouse, transforming the way we capture and share our everyday moments. With each new model, Apple continues to push the boundaries of what’s possible in smartphone photography, making high-quality imagery more accessible than ever before. The iPhone’s camera has evolved remarkably over the years, featuring advanced technology like multiple lenses, sophisticated software algorithms, and an array of creative modes. This evolution has not only democratized professional-grade photography but has also sparked a global movement of iPhone photographers, both amateur and professional.
In this blog, we delve deep into the world of iPhone photography. Whether you’re a seasoned shutterbug or a casual photographer looking to elevate your photo game, this post is packed with practical tips and tricks to help you take stunning photos with your iPhone. From mastering the basic settings to exploring advanced techniques, we’ll guide you through the journey of transforming your iPhone snapshots into captivating, high-quality images. So, grab your iPhone and let’s embark on this photographic adventure together!
Section 1: Understanding iPhone Photography Basics
The journey to exceptional iPhone photography begins with a solid understanding of the basics. Apple has consistently equipped its iPhones with features and settings that can rival traditional cameras, making it a versatile tool for photographers of all levels.
1. Key Features of the iPhone Camera:
- Lenses: Most recent iPhone models come with multiple lenses, including wide, ultra-wide, and telephoto, offering a range of perspectives and focal lengths.
- HDR (High Dynamic Range): This feature automatically balances the shadows and highlights in your photos, ensuring well-lit images even in challenging lighting conditions.
- Live Photos: A unique iPhone feature that captures a few seconds of motion and sound before and after the photo is taken, adding life to your still images.
2. Essential Camera Settings:
- Exposure Control: Simply tap the screen to focus and swipe up or down to adjust the exposure, brightening or darkening the image.
- Portrait Mode: Available on newer models, this mode uses depth-sensing technology to create a sharp focus on the subject while blurring the background, mimicking the effect of a DSLR camera.
- Burst Mode: Ideal for capturing fast-moving subjects, this mode takes multiple photos in rapid succession, ensuring you don’t miss the perfect shot.
3. The Importance of Basics:
Understanding these features and settings is crucial for better photography. While the iPhone’s auto mode is excellent, manually tweaking these settings can significantly enhance your photos. Mastering the basics allows you to creatively control the narrative of your image, from composition to final output. Whether you’re capturing a serene landscape or a bustling city street, these foundational skills are your first step towards achieving compelling mobile photography.
As we dive deeper into the world of iPhone photography, remember that experimentation is key. Each feature and setting offers a new avenue for creativity, waiting to be explored. Stay tuned as we uncover more advanced techniques to elevate your iPhone photography skills further.
Section 2: Advanced iPhone Camera Settings for Stunning Photos
Elevating your iPhone photography from good to great requires diving into some advanced camera settings. By mastering these, you can take control of your photography, creating images that truly stand out.
1. Adjusting Exposure and Focus:
- Manual Focus: Tap on the part of the scene you want to focus on. A yellow square appears, indicating the focus point. For more precise focusing, especially in close-up shots, use this feature to ensure sharpness where it matters.
- Exposure Adjustment: After setting the focus, adjust the exposure by swiping up or down on the screen. This changes the brightness of the photo. In brightly lit conditions, swiping down to reduce exposure can avoid washed-out photos. Conversely, in low-light situations, increasing exposure can bring out more detail.
2. Harnessing HDR (High Dynamic Range):
- Understanding HDR: HDR mode takes multiple shots at different exposures and combines them to create a balanced photo with detailed shadows and highlights.
- Using HDR Effectively: In high-contrast scenes, where you have both bright and dark areas, HDR can be a game-changer. It’s especially useful for landscape photography or any situation where you’re dealing with challenging lighting.
3. Mastering Portrait Mode:
- Creating Depth: Portrait mode uses the iPhone’s dual cameras to create a depth-of-field effect. This makes the subject stand out with a beautifully blurred background.
- Lighting Effects: Experiment with the various Portrait Lighting options, such as Studio Light, Contour Light, and Stage Light, to add professional-looking lighting effects to your portraits.
- Distance and Composition: For the best results, position your subject within two to eight feet from the camera. Ensure that the background is not too cluttered to maximize the depth effect.
By utilizing these advanced iPhone camera settings, you can take photos that rival those taken with professional cameras. Remember, the key to mastering iPhone photography is practice and experimentation. Don’t be afraid to try different settings in various environments to see what works best for your style. In the next section, we will explore creative iPhone camera hacks to further enhance your mobile photography skills.
Section 3: Professional Tips for iPhone Photo Composition
Capturing professional-grade photos with your iPhone isn’t just about understanding the technical aspects of the camera; it’s also about mastering the art of composition. Composition is the way elements are arranged in a photo, and it can dramatically affect the impact of your images. Let’s explore some fundamental composition techniques and the importance of lighting in iPhone photography.
1. The Rule of Thirds:
- Understanding the Rule: Imagine your image is divided into nine equal segments by two vertical and two horizontal lines. The rule of thirds suggests placing the key elements of your photo along these lines, or at their intersections.
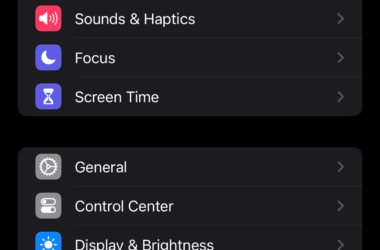
- Application: Use the iPhone’s grid feature (which can be enabled in the Camera settings) to help align subjects along these lines. Placing subjects off-center often creates more interest and balance in the photo.
2. Leading Lines:
- Concept: Leading lines are lines within an image that lead the viewer’s eye to the main subject. They can be straight, curved, zigzag, or any form that draws the viewer into the photo.
- Using Leading Lines: Look for natural lines in your surroundings, such as roads, pathways, or architectural elements. Position these lines so that they lead towards your main subject, guiding the viewer’s eye through the photograph.
3. Effective Framing:
- Technique: Framing involves using elements within your scene to frame the main subject. This can help to isolate the subject and draw focus to it.
- Practical Tips: Use doorways, windows, or overhanging branches to create a natural frame around your subject. This adds depth to your photo and can make your subject stand out.
4. The Importance of Lighting:
- Understanding Light: Good lighting is essential for creating mood, depth, and vibrancy in your photos. The best natural light for photography is during the golden hour — the first hour after sunrise and the last hour before sunset.
- Golden Hour Photography: During the golden hour, the sunlight is softer and warmer, providing ideal lighting conditions. This light adds a magical quality to photos, enhancing landscapes, cityscapes, and portraits.
By incorporating these professional composition techniques into your iPhone photography, you can create more visually appealing and impactful images. Remember, while these rules are guidelines, breaking them can sometimes lead to surprisingly creative results. Experiment with different compositions and lighting scenarios to find what works best for your photographic style. In the following section, we’ll delve into some creative iPhone camera hacks to further expand your photographic repertoire.
Section 4: Creative iPhone Camera Hacks
To truly unlock the creative potential of your iPhone camera, incorporating a few hacks and additional tools can elevate your photography game. These simple yet effective tricks can help you capture unique and professional-looking photos with ease.
1. Using External Lenses:
- Wide-Angle and Macro Lenses: Clip-on lenses expand the capabilities of your iPhone’s camera. A wide-angle lens is perfect for capturing expansive landscapes or large group photos, while a macro lens allows you to capture stunning close-up details of tiny subjects.
- Telephoto Lenses: These lenses are ideal for zooming in on distant subjects without losing clarity. They’re great for wildlife photography or any situation where you can’t get close to your subject.
- Lens Care: Always ensure your lenses are clean and securely attached to avoid any image distortion or damage to your phone’s camera.
2. Embracing Tripods and Stabilizers:
- Steady Shots: A tripod is crucial for eliminating camera shake, especially in low light conditions or when using slow shutter speeds. It’s also essential for capturing long exposure shots, such as light trails or night skies.
- Mobile Stabilizers: For video enthusiasts, a mobile stabilizer or gimbal can be a game changer. It smoothens out your videos, making them look more professional.
3. Experimenting with Slow-Motion and Time-Lapse:
- Slow-Motion Video: Slow-motion mode can turn mundane moments into dramatic scenes. It’s perfect for capturing fast-moving subjects like sports, dance, or pets in action.
- Time-Lapse Photography: This mode allows you to capture hours into seconds, showing the passage of time in a unique way. It’s great for capturing scenes like sunsets, busy cityscapes, or blooming flowers.
4. Creative Use of the iPhone Camera Features:
- Panoramas: Use the panorama mode for more than just landscapes. Try it in crowded places or to create abstract images.
- Live Photos Editing: Live Photos can be edited to choose the best frame, or even set as animated wallpapers.
By incorporating these creative hacks into your iPhone photography, you can explore new perspectives and techniques, making your photos stand out. Remember, the best camera is the one you have with you, and with these tips, your iPhone can be transformed into a powerful tool for capturing life’s moments in extraordinary ways. In the next section, we will cover how to edit and enhance your iPhone photos to perfection.
Section 5: Editing and Enhancing iPhone Photos
Capturing the photo is just the first step in the creative process of photography. The editing stage is where you can truly transform your images, bringing out their best qualities. Let’s explore the powerful editing tools available in the iPhone Photos app and some recommended third-party apps for those seeking advanced editing options.
1. Utilizing the iPhone Photos App:
- Basic Adjustments: Within the Photos app, you have a plethora of editing options. You can adjust brightness, contrast, saturation, and sharpness to enhance your image.
- Filters: The app offers a range of filters to quickly change the mood and style of your photos. From dramatic noir to warm vintage tones, these filters can add a distinctive look to your images.
- Crop and Composition: Easily crop your photos, straighten horizons, or adjust the aspect ratio. This tool is essential for refining the composition of your shot post-capture.
- Advanced Tools: For those wanting to delve deeper, the Photos app also offers advanced tools like color balance, black point adjustment, and selective color saturation.
2. Third-Party Apps for Advanced Editing:
- Adobe Lightroom Mobile: A favorite among professionals, Lightroom offers advanced editing features, including RAW editing, precise color grading, and detailed control over shadows and highlights.
- VSCO: Known for its beautiful presets and film-like filters, VSCO also provides a set of powerful editing tools for fine-tuning your images.
- Snapseed: This free app offers a range of editing tools, including selective adjustments, brush tools, and a unique Healing tool for removing unwanted elements from your photos.
- Afterlight 2: Ideal for those seeking creative editing, Afterlight 2 offers textures, light leaks, and double exposure tools for artistic effects.
3. Tips for Effective Photo Editing:
- Start with Subtle Adjustments: Over-editing can detract from the photo. Begin with subtle changes and gradually increase the intensity if needed.
- Consistency in Style: If you’re aiming for a cohesive look across your photos, such as for a blog or Instagram feed, maintaining a consistent editing style can be key.
- Explore and Experiment: Don’t be afraid to try different tools and effects. Sometimes the most striking images come from unexpected edits.
Editing is a skill that develops over time, and with practice, you’ll find your unique style. Whether you’re making simple adjustments or diving into complex edits, these tools can help you bring your creative vision to life. In the conclusion, we’ll recap the key tips shared in this post and encourage you to start experimenting with your iPhone photography.
Section 6: iPhone Photography in Maryland: A Local Perspective
While the principles of iPhone photography can be applied anywhere, each location offers its unique charm and challenges. For those in or visiting Maryland, this section highlights some of the best spots for iPhone photography and touches upon local photography communities and events that you can tap into.
1. Capturing Maryland’s Scenic Beauty:
- Chesapeake Bay: The largest estuary in the United States, Chesapeake Bay, offers stunning waterfront scenes, especially during sunrise and sunset. Capture the play of light on the water or the intricate patterns of the docks and boats.
- Great Falls: Located on the Potomac River, Great Falls presents a dramatic landscape ideal for nature photography. The cascading waters and surrounding greenery are perfect for practicing long exposure and landscape photography.
- Baltimore’s Inner Harbor: An iconic spot, the Inner Harbor is great for urban photography. The mix of old and modern architecture, along with the bustling street life, provides ample opportunities for compelling compositions.
2. Exploring Historical and Cultural Sites:
- Annapolis: The historic streets of Annapolis are a treasure trove for photographers. The colonial architecture and vibrant street scenes make for excellent subjects, especially when experimenting with different perspectives and angles.
- Antietam National Battlefield: A site of great historical significance, it offers a blend of solemnity and natural beauty. Use your iPhone to capture the serene landscapes and the poignant monuments dotting the area.
3. Local iPhone Photography Communities and Events:
- Photography Meetups: Maryland hosts various photography meetups and workshops, which are great for connecting with fellow enthusiasts. These gatherings often include photowalks in scenic areas, offering both learning and networking opportunities.
- Photography Exhibitions and Contests: Keep an eye out for local photography exhibitions and contests. Participating in these events can be a great way to showcase your work and gain feedback.
- Online Communities: Join Maryland-based photography groups on social media platforms. These communities are valuable resources for tips, location recommendations, and potential collaborations.
Remember, the best way to improve is to keep shooting, so grab your iPhone and start exploring the photographic potential that Maryland has to offer!
Conclusion:
We’ve journeyed through the exciting world of iPhone photography, exploring a range of techniques and tips to help you capture stunning images with just your smartphone. Let’s recap the key takeaways:
- Understanding the Basics: Familiarize yourself with the iPhone’s camera features and settings. Mastering exposure, focus, and HDR can significantly improve your photos.
- Advanced Settings: Utilize advanced settings like Portrait mode and learn to adjust exposure and focus manually for more control over your images.
- Composition Techniques: Apply professional composition techniques such as the rule of thirds, leading lines, and framing to create visually appealing photos.
- Creative Hacks: Experiment with external lenses, tripods, and explore iPhone features like slow-motion and time-lapse to add a creative twist to your shots.
- Editing and Enhancing: Use the iPhone’s built-in editing tools and explore third-party apps for more advanced editing options to polish your photos.
- Local Flavor: For those in Maryland, explore the picturesque locations and engage with local photography communities to enhance your skills and experience.
Photography is an art of observation and expression. Your iPhone is a powerful tool, capable of capturing the beauty and uniqueness of the world around you. I encourage you to experiment with these techniques, no matter where you are. Each photograph you take is a step forward in your creative journey.
Lastly, I’d love to see your work and hear about your experiences. Share your favorite iPhone photos and any new tricks you’ve discovered in the comments below or tag us on social media. Let’s inspire each other and grow as a community of iPhone photographers. Happy shooting!
Call to Action:
Now that you’re equipped with these iPhone photography insights, I’m eager to hear from you! Photography is a shared journey, and your experiences and tips can inspire and enlighten others. Here’s how you can get involved:
- Share Your Tips: Do you have a favorite iPhone photography trick or a hidden feature you love? Maybe a special editing technique or a creative hack you’ve discovered? Drop your thoughts in the comments section below. Your unique perspective might be exactly what another reader needs to elevate their photography game!
- Join Our Community: If you’ve found value in this post, consider following our blog. We’re constantly exploring new topics, techniques, and ideas in the world of photography. By following, you’ll stay updated with the latest posts and insights, ensuring you never miss out on valuable content.
- Tag Us in Your Photos: As you apply these techniques in your photography, share your best shots with us on social media. Tag us in your posts or use our dedicated hashtag. We love seeing how our readers translate advice into stunning visual stories!
- Subscribe for Updates: For those who want to dive deeper, subscribe to our newsletter. You’ll receive exclusive content, advanced tips, and early access to upcoming workshops or events.
Your engagement and feedback fuel this community, making it a richer and more inclusive space for photography enthusiasts. So, start experimenting, keep capturing the world through your lens, and let’s grow together as a community of passionate iPhone photographers.
Looking forward to seeing your amazing shots and reading your valuable tips!