


1. Introduction
In an era dominated by digital transactions, Apple Pay has emerged as a frontrunner in the mobile payment landscape. Launched by Apple Inc., this service allows iPhone users to make payments in a secure, private, and convenient way directly from their devices. Whether buying groceries, catching a ride, or purchasing online, Apple Pay simplifies the checkout process with a tap or a glance.
One of the standout features of Apple Pay is its integration into the iOS ecosystem, making it incredibly user-friendly for iPhone users. Not only does it speed up the payment process by eliminating the need to enter card details, but it also enhances security. Each transaction with Apple Pay is authenticated through Face ID, Touch ID, or a passcode, and uses a device-specific number and unique transaction code, ensuring that your card details are never shared with merchants or stored on your device.
2. Setting Up Apple Pay on Your iPhone
Getting Apple Pay up and running on your iPhone is a straightforward process. Here’s a step-by-step guide to adding your first card to Apple Pay:
- Open the Wallet app on your iPhone. You can find this app on your home screen or by searching in your apps.
- Tap the ‘+’ sign in the upper right corner. This is your gateway to adding cards to Apple Pay.
- Follow the on-screen instructions to add a new card. You will have the option to scan your credit or debit card with your iPhone’s camera or enter your card details manually.
- Verify your information with your bank. For security purposes, your bank may need to send you a verification code via text, email, or a phone call. Follow the prompts to verify your card.
- Complete the setup. Once your card is verified, it will be added to your Wallet app, and you can start using Apple Pay.
2.1 Tips for Ensuring the Setup Process is Smooth and Secure
To ensure that your Apple Pay setup is not only smooth but secure, consider the following tips:
- Secure your device. Before setting up Apple Pay, make sure your iPhone has a passcode set up and that Face ID or Touch ID is enabled. This adds an extra layer of security to your digital wallet.
- Use a strong Wi-Fi connection. When setting up Apple Pay, ensure you are connected to a secure Wi-Fi network to prevent unauthorized access during the setup process.
- Update your iOS. Keep your iPhone’s operating system updated to the latest version to ensure you have the latest security patches and features for Apple Pay.
- Contact your bank if necessary. If you encounter any issues during the card addition process, don’t hesitate to contact your bank directly for assistance.
3. How to Use Apple Pay on Your iPhone
Apple Pay transforms your iPhone into a powerful, secure wallet, allowing you to make payments effortlessly wherever you go. Here’s how to use Apple Pay in different contexts:
3.1 Making Payments in Stores
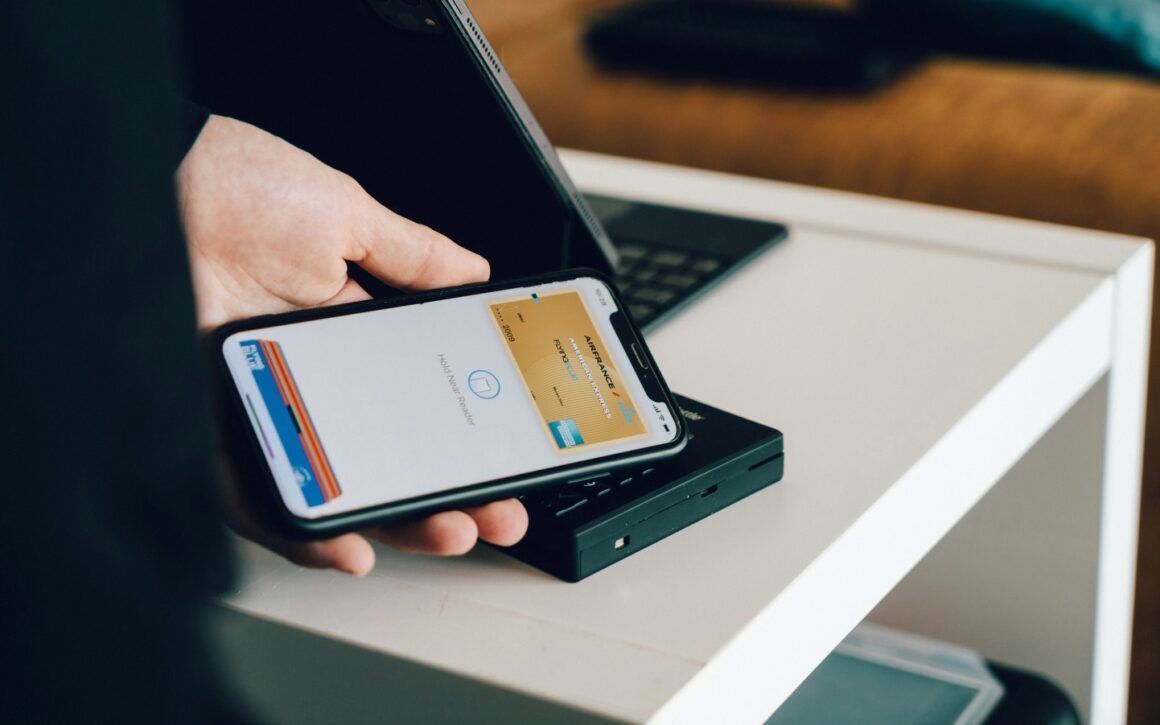
- Look for the Apple Pay symbol at the checkout counter or near the payment terminal. This symbol resembles a hand holding an Apple with a wave pattern in front.
- Double-click the side button on your iPhone to activate Apple Pay. If you have Face ID enabled, glance at your phone to authenticate, or use your Touch ID or passcode if that’s your preference.
- Hold the top of your iPhone near the contactless reader until you see “Done” and a checkmark on the display. This indicates that the payment was successful.
3.2 Making Payments in Apps and on Websites
- Choose Apple Pay at checkout. When shopping in apps or on websites that support Apple Pay, look for the Apple Pay button at checkout.
- Review your payment details. Ensure that your billing, shipping, and contact information are correct. You can quickly switch between cards if necessary right before payment.
- Confirm the payment. Authenticate the transaction using Face ID, Touch ID, or your passcode.
3.3 Where is Apple Pay Accepted?
Apple Pay is accepted in millions of places around the world, including retail stores, restaurants, hotels, gas stations, and more. To determine if a location accepts Apple Pay, look for the Apple Pay symbols at the point of sale or ask the staff. Additionally, many apps and online stores also offer Apple Pay as a payment option.
4. Best Practices for Apple Pay on iPhone
Maximizing the benefits of Apple Pay involves more than just making payments; managing your cards and settings effectively is key:
4.1 Managing Your Cards
- Organize your cards. In the Wallet app, you can arrange your cards in order of preference. Simply hold and drag your most frequently used card to the front to set it as your default.
- Regularly update your cards. If a card expires or your bank issues a new one, update your information promptly to avoid declined transactions.
4.2 Settings for Optimal Use
- Enable transaction notifications. This keeps you informed every time a transaction is made, allowing you to spot any unauthorized use instantly.
- Regularly review transaction history. Use the Wallet app to monitor your spending and check detailed transaction information, which can help with budgeting and spotting errors.
4.3 Verifying Transactions and Maintaining Privacy
- Verify your transactions. Always compare the amounts charged in the Wallet app with your bank statements.
- Be aware of privacy settings. Apple Pay is designed with privacy in mind, not storing or sharing your card numbers. However, always be cautious about where and how you use your device to make payments.
By understanding how to use Apple Pay in various situations and following these best practices, you can make the most out of this convenient payment method while ensuring your transactions are secure and your financial data remains private.
5. Troubleshooting Common Apple Pay Issues
Using Apple Pay is typically a seamless process, but occasionally you might encounter some issues. Here are some common problems and how to troubleshoot them:
5.1 Payment Not Going Through
- Check Device Connectivity: Ensure your iPhone has a signal and is connected to the internet if necessary, especially for app or web purchases.
- Verify Card Activation: Confirm that the card you are using is activated and approved for Apple Pay by your bank.
- Ensure NFC is Enabled: Make sure NFC (Near Field Communication) is turned on in your settings as it is needed to communicate with payment terminals.
5.2 Card Not Accepted
- Confirm with Your Bank: Sometimes, a card might not be accepted due to bank restrictions or specific settings. Contact your bank to ensure that your card is set up for mobile payments.
- Check for Updates: Ensure your iPhone and the iOS are up-to-date, as updates often include fixes for payment processing issues.
- Re-add Your Card: Remove the card from Apple Pay and add it again. This can resolve issues that stem from the initial setup.
6. Security Features of Apple Pay
Apple Pay is designed with multiple layers of security to protect your information:
6.1 Advanced Security Technologies
- Tokenization: Apple Pay uses a unique device account number instead of your actual card number, so your real card details are never shared with merchants or stored on your device.
- Authentication: Transactions require authentication through Face ID, Touch ID, or your passcode, adding a level of security that prevents unauthorized use.
6.2 Safe Usage Practices
- Monitor Your Transactions: Regularly check your transaction history through the Wallet app and compare it with your bank records.
- Use Secure Networks: Avoid making transactions over public Wi-Fi networks. Use your cellular network or a secure Wi-Fi network whenever possible.
7. Comparing Apple Pay with Other Mobile Payment Options
Apple Pay, Google Wallet, and Samsung Pay are prominent players in the mobile payment market, each with unique features:
7.1 Apple Pay vs. Google Wallet vs. Samsung Pay
- User Interface: Apple Pay offers a streamlined, user-friendly interface that is well integrated into the iOS ecosystem.
- Security: While all three services offer strong security measures, Apple Pay’s integration with iOS hardware gives it an edge in secure biometrics.
- Availability: Samsung Pay has an advantage in being accepted at more places due to its MST technology, which works with older magnetic stripe terminals as well as NFC terminals.
7.2 Pros and Cons
- Pros of Apple Pay: Superior integration with iOS devices, enhanced security features, and a wide acceptance among NFC-enabled terminals.
- Cons of Apple Pay: Limited to Apple devices, which might be a drawback for households or businesses with a variety of device ecosystems.
Conclusion
Apple Pay represents a significant advancement in digital wallet technology, offering convenience, speed, and enhanced security for financial transactions. It eliminates the need to carry physical wallets and reduces the risk of fraud. As digital wallets continue to evolve and become more widely accepted, Apple Pay stands out as a robust option for iPhone users.
If you haven’t already, consider setting up Apple Pay to experience firsthand the convenience and security it offers. Embrace this technology to make your transactions smoother and safer. Whether you’re buying coffee, shopping online, or paying for services, Apple Pay can simplify and secure your purchasing process.